Hello darlings!
I want to start by showing you my five favorite pins from this week. I think I’m going to start doing this with all of my posts, because it might inspire you! 🙂 These aren’t going to follow my pattern of easy things that I can show you how to make (or how NOT to make) but they’re still fun! I’ll do a food one, a clothing/accessory one, a home decor one, a wedding one (my very favorite even though I’m a good five years from acceptable marriage age) and maybe a random, like a cute puppy. Or Channing Tatum. We could all use some Channing Tatum in our lives.
As we recover from the fainting that I’m sure we all just did, here are my top five pins this week 🙂
Those are the pins from this week that made my heart hurt I wanted them so badly. Yes, I even want the elephant. Better get rich quick. And move to Africa.
Anyway, the challenge this week was Bite Sized Apple Pies, as you may have deduced from the title of the post. I thought I would make a fall-themed dessert to celebrate the beginning of October 🙂 Each week this month, I’ll be taking on a Halloween or autumn themed pin. I have them all mapped out already and I’m so pumpedddd!
This week’s apple pie pin took me to this link: http://cookinupnorth.blogspot.com/2011/09/bite-size-apple-pies-from-taste-of-home.html and it’s a cute blog by a lady named Laurie who really REALLY enjoys her home “up north.” Now, care to venture a guess as which end result belongs to me and which belongs to Laurie?
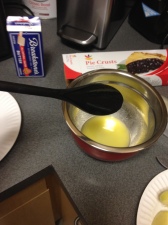
Honestly, even though they aren’t exactly pretty, they tasted pretty delicious. The most amazing part of the whole thing is that when I brought all of my ingredients down to the kitchen in my dorm building, I neglected to bring the recipe. And the dorm kitchen has the weirdest assortment of useless items that I’ve ever seen. There’s no peeler and no brush thingy to spread stuff, but you better believe there was a whole drawer dedicated to grill utensils. There’s no grill anywhere near my building. So, I had to spread my melted butter like this:
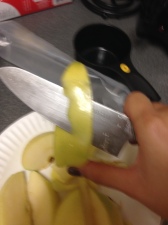
and peel my apples like this:
And the counter space that you see here is the only counter space in the whole kitchen. And I thought my room was small.
Anyway, let’s start at the beginning. Here’s the recipe Laurie used, with my edits.
½ c sugar2 tsp cinnamon- If the grocery store happens to somehow be out of cinnamon, (what?!) just substitute cinnamon sugar. It eliminates a need for sugar, and you don’t have to mix them together so in the end it saves time.
- 1 pkg refrigerated pie crust (mine came with two 8-inch round crusts, worked perfectly)
- 3 tbsp melted butter divided (Don’t know what “divided” means- didn’t bother with it)
- 2 medium tart apples sliced into 8 wedges each (I got green apples because I heard they’re “tart” but Laurie used red ones)
If you do it my way, you can just unroll the pie crust on a lightly floured surface. What’s that? You didn’t get any flour because that wasn’t in the list of materials? Join the club. It’s okay though, it didn’t make a difference to me. Then, melt your butter and brush it all over the crust. Next, sprinkle the cinnamon sugar all over it, and slice it into 8 slices, about one inch thick. Now, you can set that aside.
BUT DON’T SET IT ASIDE ON THE STOVE BECAUSE THE OVEN SHOULD BE PREHEATING (at 425, by the way) AND THE STOVE WILL BE HOT ENOUGH TO MELT YOUR CRUST! Yeah, it’s a good thing the package came with two pie crusts. I only got to make half the recipe though, which meant that an apple went to waste.
Next, you need to deal with your apples. If you have a handy dandy apple slicer like I have at home, this should be a piece of cake. At school though, it was a little bit harder because I had to use an old dull knife to cut through the core of an apple. Since there was no peeler, I also had to use that same knife to peel the skin off. Laurie said that she kept the skin on because she liked the color, but I was worried it would make the texture a little tougher or something, so I peeled it off. Then, all you have to do is roll each little apple up in the slices of dough you just made, and brush the top with melted butter and sprinkle with some more cinnamon sugar. If you’re me though, and you’re brushless, you’ll find a slotted spoon and dip each pastry in a bowl of butter. I actually thought it was pretty clever of me.
Then you just pop them in the oven for 13 minutes! If everything had gone as planned, which it never does of course, this would have been done in under a half hour. Regardless, they were delicious and easy. Look at these cute little guys!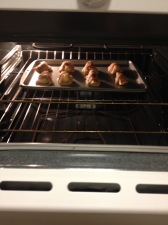
Well, I hope you enjoy your Bite Sized Apple Pies, and I hope you have an absolutely fabulous October! Keep track of how many days are left until Halloween with my nifty countdown in the sidebar 😉
Stay wonderful ♥
~Nicole


