About etsyunder50

My name is Nicole, and I'm a grad student in psychology with an extra passion for writing! My blog, Etsy Under 50, celebrates small Etsy businesses trying to build their crafts

Sweet Southern Cornbread

I’ll admit it: my secret dream is to have people love me for my cooking. That’s why I’ve been baking my butt off lately, trying to fill my recipe box with things that I can take to school and impress people with. Today, my sister was craving apple turnovers, so I made her my recipe for Apple Pie Bites. While we were at the grocery store getting the ingredients, I remembered that I’ve been wanting to try this cornbread recipe, pinned from American Heritage Cooking, so I got what I needed for that, too. 

Well, I thought I got everything I needed. Let’s start at the beginning though. Here are the ingredients, as listed by Lindsay Farr, the author of the original blog post.

“½ cup unsalted butter

2/3 cup sugar

2 eggs

1 cup buttermilk

½ cup cornmeal

1 cup all-purpose flour

½ t baking soda

½ t salt”

I only bought the buttermilk and cornmeal, because I was positive I had everything else at home. The rest are like, baking staples, you know? So I got home, and I always set all of my ingredients out on the counter before I start. The very first ingredient was unsalted butter, and I only had one half stick, which is a quarter cup. I had plenty of salted butter, so I pulled a very daring move and used the unsalted butter that I had, along with a half a stick of salted butter. 

The first step in the recipe is to grease an 8-inch pan and preheat the oven to 375, and then the second step is to melt the butter “in a large skillet.” I LOL’ed and melted it in the microwave because:

Then you mix in the sugar with a whisk, and this made it pretty chunky. Then, you “quickly” add the eggs. I guess you have to do it quickly so the butter mixture doesn’t dry out, but that’s just a guess. 

Next, you have to make another mixture of the buttermilk and the baking soda. Here’s where I may have screwed up a little, because I didn’t have baking soda. Well, I did, but it had expired in 2011. So, I Googled how to substitute baking powder for baking soda, and found out that even though they’re different, it is possible. According to an article on chemistry.about.com, the ideal way to do it is to use 3x as much baking powder as you would baking soda. So, the recipe calls for 1/2 a teaspoon, so you would use 1 and 1/2 teaspoons. HOWEVER, it went on to say that this messes with the taste of the recipe a bit, so there’s a compromise. You should double it instead of triple it (so it would be 1 teaspoon now) and omit any salt. I did that, but then I was thinking “well shit, I used salted butter when I wasn’t supposed to,” so there went that. I did my best though. So, with all of my edits, this is what the ingredients list looked like for my version:

½ 1/4 cup unsalted butter

1/4 cup salted butter

2/3 cup sugar

2 eggs

1 cup buttermilk

½ cup cornmeal

1 cup all-purpose flour

½ t baking soda 1 t baking powder

½ t salt” 

So after I figured out what to do about the baking soda issue, I had to mix it with the buttermilk. Lindsay from American Heritage Cooking put a warning in her recipe about how you should do this quickly, because this mixture will immediately start creating CO2, flattening the cornbread and doubling the volume of the buttermilk, which we do not want. So I got a little nervous, and quickly just dumped the powder on top of the buttermilk in a measuring cup and dumped it in the mixing bowl. I did literally no mixing, which was probably a mistake in hindsight. 

After this, you add the flour, cornmeal and salt if you’re using it. Blend it well with your whisk, until it’s only a little bit lumpy. Then, pour it in your greased 8 inch pan, and pop it in the oven for a half hour!

After 30 minutes, I did the toothpick test, and it came out clean, even though the original recipe said it may take up to 40 minutes. When I cut it, I noticed it was very dense. Here, take a look:

IMG_4570[1]


When I tried it, I noticed that it was very buttery, but I had it in my head that it was going to be sweeter, and I was a little disappointed that it was a little, well, not. It was very buttery though, and that was good. I liked the second and third bites better than the first, if that makes any sense. 

If I were to try this recipe again, which I very well might do, I think I’ll have to just do it more by-the-book than I did this time. I made a lot of changes that might have changed the original taste and texture, so that’s my fault. But, now you guys have the original recipe as well as my version, so you can try it for yourselves and let me know what you think in the comments! Thanks for reading!

Easy Feta Dip

So, I went to a work party last night, which sounds like it should be lame, but not with my co-workers! Most of us have only known each other for the summer, but we all hit it off so well that we decided to throw a party before we go back to our separate colleges. Some of us will be back for Winter Break, and some for summers too, but others are hoping to be onto big and better things by next summer, so it was important that we have this night together. And look how much fun we had!

IMG_4547[1] IMG_4548[1] IMG_4549[1] IMG_4554[1] IMG_4555[1]

They’re just the coolest people, and I can’t believe I only have a week left with them!

Anyway, the part that you guys care about. My best friend, who was the one having the party, asked me to make an appetizer and a dessert to bring over. I knew which dessert I would bring; I have a recipe for lemon coconut bars that people ask me for every time I bring them somewhere! They’re great for summer because they’re sweet but very light and refreshing. I love them! The appetizer recipe was a little harder to decide on though, because I didn’t already have a tried-and-true one to use. I browsed Pinterest, because duh, what else would you do in this situation?

I picked out this “easy feta dip” because, well, it was easy. And I could blog about it. And also, because it seemed like something that my friend who was having the party would like. Here’s what the recipe in the pin was:


  • about 1/3 cup olive oil
  • 3 Roma tomatoes, seeded and diced
  • 4-5 green onions, sliced thinly
  • 8 ounces feta cheese, crumbled (see Note)
  • 2-3 teaspoons Cavender’s Greek seasoning
  • fresh baguette, sliced thinly

(credit goes to: The Girl Who Ate Everything)

Here’s what happened when I did it:

Well, I had to prep the night before, because I was going to be out the whole day of the party. So, I sliced the tomatoes, which was easy enough. Then, I learned how to slice green onions courtesy of a Youtube video. If you don’t feel like watching, it basically says that the light part of the onion is for cooking and the dark part is used for garnishing dishes. You can kind of tell, because the part that you cook with has layers like a teeny tiny regular onion, and the dark part is less substantial (more leafy). 

I also couldn’t find Cavender’s Greek Seasoning at my local grocery store. I’ve never even heard of Cavender’s before. Instead, I Googled what’s in Greek seasoning, and made it myself. If you have the same problem, here’s what’s in it:

  • 1 1/2 tsp dried oregano
  • 1 tsp thyme (I only had about 1/4 tsp of thyme; it didn’t ruin anything)
  • 1/2 tsp dried marjoram
  • 1/2 tsp dried minced onion
  • 1/4 tsp dried minced garlic

That was all the prep that I did the night before. I put all of the separate ingredients in Ziploc bags and put them in the fridge until it was time to go to the party. I also brought my bread and container of feta cheese, which was only a 6 oz container. I thought that was better than 8 oz because feta is so strong.

When I got there, I put the tomatoes, green onions and seasoning all in one Ziploc bag and shook it up. If you’re wondering, I forgot to measure the amount of seasoning that was actually supposed to go into the dip recipe, and just dumped the whole serving of the seasoning recipe into the bag. It’s actually only slightly more than what the dip recipe calls for, so it didn’t make much of a difference. Then, I put the feta in, and mixed it again. However, in the heat of the moment, 6 oz seemed like a huuuge amount, and I ended up only using half of that. 

THEN, it was time to make it pretty. The recipe called for olive oil to coat the bottom of the serving dish, but I actually forgot to bring it, so I simply didn’t use it, and I think it was better that way anyway. Personally, I think the olive oil would have made it too wet and goopy. This way, it looked fresh. I dumped the contents of the Ziploc bag into a nice bowl, and placed the sliced bread around it. Voila! A beautiful, easy appetizer that, from start to finish, took about a half hour to make. 

IMG_4542[1]


If I were to try this recipe again, I would probably toast the bread with olive oil and a little garlic instead of using plain Italian/French bread. Other than that, it was delicious! This is the first appetizer in my recipe box!


Grownup Coloring Pages

This isn’t really a craft, but it was a really cool pin that I thought a lot of people might be interested in. They’re coloring pages for adults! I know I’m not alone in this, (if I am, don’t tell me!) but coloring is relaxing, even at 20 years old. So take a look, here’s where my pin’s link brought me:

geometrip.com/free/coloring/designs

And look what I did!

IMG_4502[1]

IMG_4503[1]

Yes, it’s an odd choice of colors but I didn’t really go into it with a plan 😦 My new plan is to use these coloring pages as my go-to for stress relief! Have fun trying them!


Etching Glass

Hello Hello!

It’s been a while, I know. But now the semester is over and I can get back to full time crafting and baking 🙂 I haven’t done a craft in a long time; I’ve been primarily focusing on recipes lately, so I thought I would switch it up a little bit and learn how to do a new craft. Pinterest told me that it was very easy to learn how to etch glass, and that the results are absolutely fabulous. So, that’s the task that I took on yesterday.

The pinner said that all you need is etching cream, rubber gloves and a piece of glass that you want to work with. Well, that’s essentially true, but you also need a few other things. Here’s the real list:

1. A well ventilated area- I chose to do this outside in my backyard

2. Drop cloth- I just used newspaper, but I don’t know if that’s a good enough substitute- luckily I was very careful and didn’t find out the hard way

3. Etching cream- the Michael’s near me doesn’t carry etching cream, so I had to go to AC Moore. Not an actual problem, but I just like Michael’s better. Couldn’t even tell ya why because apparently AC Moore has more stuff. I used Armour Etch, which costs about $9.00, give or take. THIS STUFF IS LITERALLY ACID. Like, for real, that’s what it is. That’s why you need:

4. Rubber gloves- BECAUSE THE STUFF IS ACID. Also why I chose to do the project outside, and why you need a well-ventilated area. They also suggest safety eye wear. I wear glasses so I didn’t bother, especially since I was in a well ventilated area. However, depending on how dangerously you like to live, you could wear safety glasses as well.

5. A paintbrush- or Popsicle stick. Some say that a Popsicle stick works better, but I used a paintbrush and didn’t have a problem.

6. Painter’s tape- as a stencil

7. X-acto Knife- to cut out the design you want to use

8. Glass cleaner- because if the glass is dirty the cream won’t work as well

Now, just as a disclaimer, I’m cheating a little bit here because I actually bought a glass-etching kit, but from reading blog posts and from the experience I had, I still know what I’m talking about, don’t you worry. I decided to do this because every time I see plain glass somewhere I want to buy it and paint it to look like the sea glass thing that I showed you. Then, I realized that I didn’t have a purpose for something like that, so I made it a goal to find something else to do with glass.

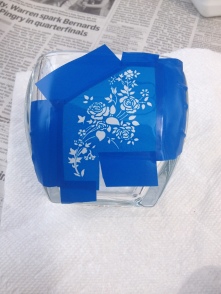
First, spread out your drop cloth in your well ventilated area. Then, clean your glass. Make sure there are no fingerprints, etc. on it before you begin. Now, place your tape where you want the design to go, and use the X-acto knife to draw your design. I’ll show you mine, although mine is WAY more intricate than I could actually do with my own hands, because like I said, I had a kit. They gave me the stencils already made. This’ll be the hard part for you

.Image


See, I could never draw that, never mind draw it with a knife. 

Anyway, the white part is going to be the part where your design shows up, and the rest of the tape is there to make sure that no etching cream gets in the area around the design. Now, PUT ON YOUR RUBBER GLOVES because once your design is done, it’s time to do the etching. 

Shake the bottle well. I know it says that on the directions, but just in case you don’t read directions, shake the bottle 🙂 Now, take your paintbrush, and get a glob of it on the brush. Spread it generously on top of the white part of the design, thick enough so that you can’t see the design underneath it anymore. Be careful not to get any outside of where the tape is, because once it’s there, its permanent. While it’s sitting there, it’s like literally burning into the glass. 

I wish I had a picture of that to show you, but I got so caught up in the anxiety of dealing with such a permanent thing that could burn me that I didn’t really think to. Sorry 😦 Leave the cream on for one minute. That’s what the instructions said to do, but you can leave it on for a little bit longer so it doesn’t come out fainter than you want it to. After the time is up, take it to a STAINLESS STEEL SINK to wash all the cream off. Keep your gloves on while you do this, you still can’t touch it even when you’re rinsing it off. And it should be a stainless steel sink because the cream can wear down some other kinds of sinks like porcelain, etc. 

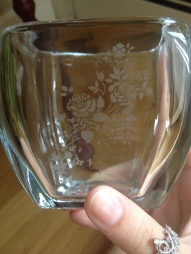
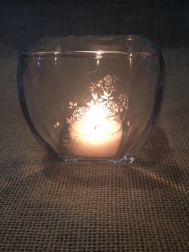
Once all of the cream has washed off, don’t panic if it looks a little light. Once you dry it and give it a minute to do whatever it does, it’ll get darker, don’t worry. Your finished result should look a little something like this, and it’ll be beautiful 🙂

Image    Image


I have a cool little update for you: This candle holder is available for sale on my Etsy store! Take a look: https://www.etsy.com/listing/190612022/etched-glass-candle-holder-tea-light?ref=shop_home_active_1


“Nutella Dream Pocket Cookies”

Hi guys!

Today I’m live-baking these amazing looking things called “Nutella Dream Pocket Cookies,” a term which seems to be coined by this blogger: http://www.chocolatemoosey.com/2013/09/19/nutella-dream-pocket-cookies/

I came across Carla’s blog post on Pinterest of course, because as you guys know I find all of my projects on Pinterest. She was making these cookies as a tribute to her friend who passed away from Leukemia. I don’t have quite as noble a cause, but then again you don’t really need any sort of cause to make cookies, especially when Nutella is involved. Nutella is enough of a reason 🙂

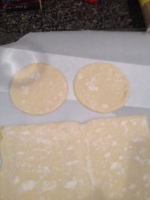
Well, I think that I have this brilliant idea for how to make this recipe even easier than it already is. You see, Carla has her readers making the dough themselves, but I happen to have a box of pre-made puff pastry sheets in the freezer. I’ll make both kinds to see which one is better, because one is significantly easier and one is well, the right way.  

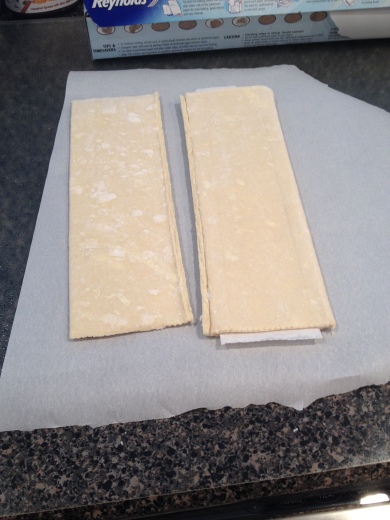
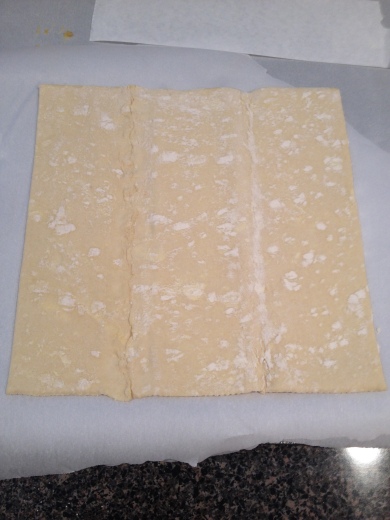
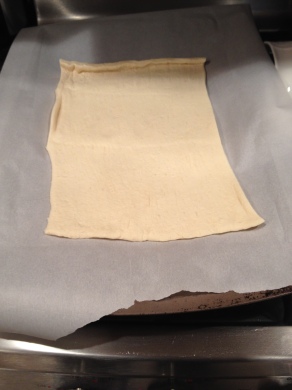
OH well considering the puff pastry needs 40 minutes to thaw, I guess I’ll start with the other kind. I guess I wasn’t supposed to try to unfold it yet…

Image


I think it should still be okay. The cookies shouldn’t be wider than that strip anyway. I set my oven timer for 40 minutes and set the puff pastry to the side so I could focus on the correct recipe.

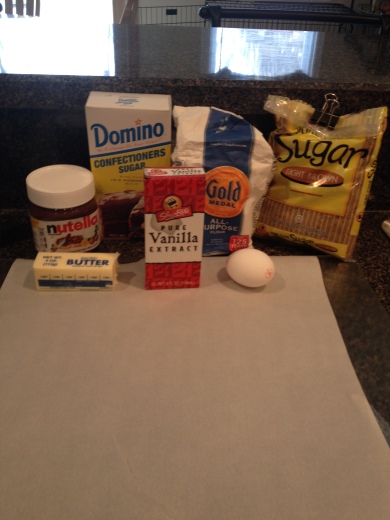
For the right version, you need all this stuff: 

  • 6 tablespoons butter- you definitely need to soften it because the original recipe doesn’t say to, but then it tells you to mix it with both kinds of sugar and there’s no way that’ll work unless you soften it. I like, liquefied it, and I was worried it was too much, but it worked out fine. 
  • 1/4 cup powdered sugar
  • 2 tablespoons brown sugar- try to break it up as much as possible
  • 1 egg yolk
  • 1/2 teaspoon vanilla extract
  • 3/4 cup all purpose flour
  • 1 tablespoon Nutella- I feel like that’s hardly anything. I might be a little bit more generous with my Nutella. 

Image

Okay, so I softened the butter and I mixed it in with the two sugars until (essentially) smooth. The next step is to add in the egg yolk and the vanilla. Remember when I separated an egg for the first time? I love when new skills come in handy! 

Now I’m running into a slight issue because my brown sugar was really hard and chunky when I put it in the mixture, so there are still little chunks in it even though the rest of the mixture is light and fluffy like the recipe says it should be. I think I’m going to ignore it and move on…

Now I’m gradually adding in the flour. It’s getting more dough-like, exactly as it should, and I just tasted it. It’s DELICIOUS. I don’t even think it needs Nutella, I would eat it just like this. I gathered all the dough into a ball and flattened it into a disk, and now it’s in the fridge for an hour to chill. That’s actually a little annoying because I didn’t realize I was going to have to do that, but it gives me some time to focus on the puff pastry version of the recipe, which is ready to get started now that it’s defrosted. 

I tried to put the broken piece back together, but I’m not sure that it worked very well. Either way, like I said, I’m not sure that it really matters.

Image

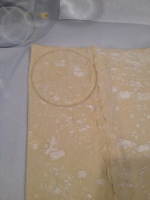
I’m using a wine glass to get my circle shape, because I’m very resourceful, but I suggest using the lid of a mason jar. It’s equally resourceful but I just have more wine glasses available than mason jars. Somewhat odd but also somewhat fitting. If you have a circle shaped cookie cutter then that’s obviously ideal, but less resourceful. Now, make two circles, like this:

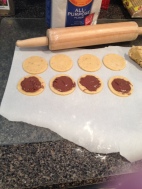
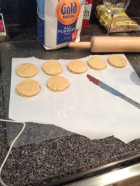
Image Image  Image

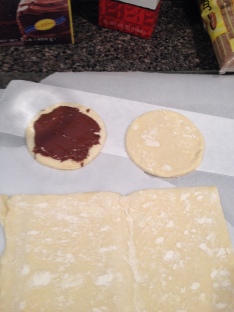
Then, spread some Nutella on one of them, and sandwich them together so they look like an Uncrustable. Use a fork to make the pretty edges like the picture. 

Image

EXCUSE ME?! You don’t know what an Uncrustable is?? What kind of sad childhood did you have? I had two of these every single day for lunch in middle school. I would rip off the “crust” and eat it, and then eat the sandwich part. Love those things. OMG I want one right now. 

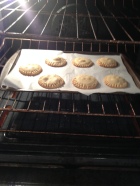
Sorry, I’m back from memory lane. My oven is at 350, and my cookies are formed. I’m putting them in the oven for 12 minutes to start; it says 12-15. 

.

..

..

.

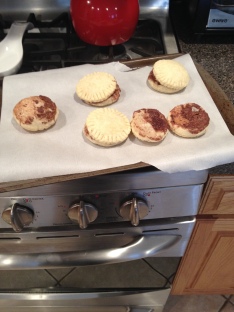
Well. It’s been 12 minutes, and they’re definitely done -____-

Image

That little half one that I made popped right open and another one just fell apart. I guess they call it “puff” pastry for a reason, duh. Okay, so that wasn’t my most brilliant idea. But actually, if you squish them down a little, they don’t really look that bad. Definitely not ideal, possibly a little sick looking, but not inedible. 

Image

And they taste pretty delicious, too. It tastes like a chocolate croissant; like a fresh version of the one that they have at Starbucks. I consider this a modest success. 

Now, since the dough I made by hand has been chilling for about an hour, I’m gonna go back to the original recipe. I spread some flour all over a rolling pin, and rolled out the dough so it was preeeetty thin. I used the wine glass technique again to cut out circles, and then did the same thing that I did with the puff pastry version. Spread Nutella on half of the circles and then put the rest of the circles on top, then smooshed the edges down with a fork so they look like Uncrustables.

Image Image Image

Now the second batch is in the oven!

.

..

..

.

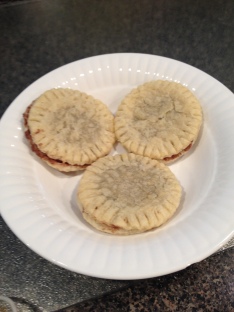
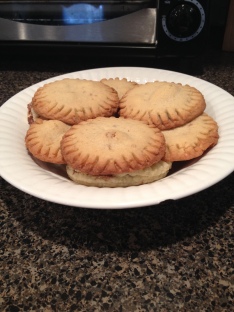
And they’re done! I may have overcooked them a little bit, because they look a little dark around the edges, but they look pretty good to me!

Image


I actually like the taste of the first ones better, but I like the look of these better. These are great too, don’t get me wrong, but the taste of the cookie seriously overpowered the taste of the Nutella. They taste like sugar cookies with a hint of chocolate. For my next batch, I think I’ll be even more generous with the filling for my fellow Nutella-lovers 🙂

I hope you enjoyed this recipe! Let me know what you think of it. I always love getting messages and comments 🙂

Sea Glass Minus the Actual Sea

Hi guys!

As you can probably tell, I’m deviating from my Sunday schedule, mostly because I’m too busy to have something planned for every week. But this is cool because sometimes I’ll have more than one thing to post and you don’t have to wait a week to be able to see it. So here’s today’s thing.

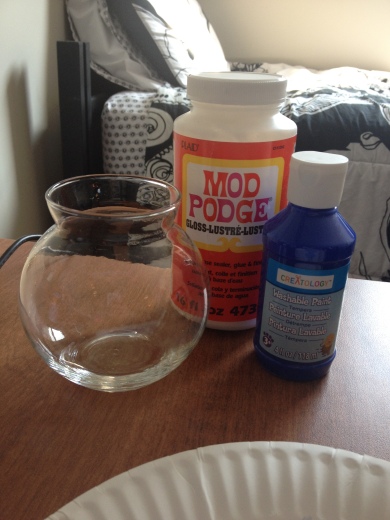
Yesterday I did that tutorial that’s circled around for a while on how to give glass that frosty sea glass effect. It’s super easy, and the tutorial I followed complicated it even further than it had to be. Here’s what you need:

A glass object- a bottle, mason jar, vase, etc

Mod Podge- they say that the matte finish one works best but mine is like, high gloss or something completely opposite and it worked out fine. I have a giant like industrial sized bottle so I wasn’t about to go out and get a new one for this project. 

Paint and one of those spongy paintbrushes. I used a regular one though.

Image


I got that little jar when they had a “lucky bamboo” event at my school. Don’t know why, but it was cute. There was a little lemonade stand kinda thing outside one of the buildings and we took a jar, these really cool, colorful water bead things that get bigger as they absorb more water, and then we just kinda stuck bamboo stalks in it. Pointless, but super cute and more importantly, free. Not actually lucky though, unfortunately. Then I let it sit in my room for five weeks over winter break, and it died. If that’s not an indication of how not green my thumb is, I’ve also killed a cactus. It literally needs zero things, and somehow I killed it. 

That paper plate on the bottom of the picture is for mixing the paint and the Mod Podge, so I guess I should mention that you also need some kind of paint-mixing surface, whatever it may be. If you’re fancy and you have one of those palette things, use that because you can. I wish I could. 

Ya know, one of these things. Also Bob Ross: gotta love that guy.

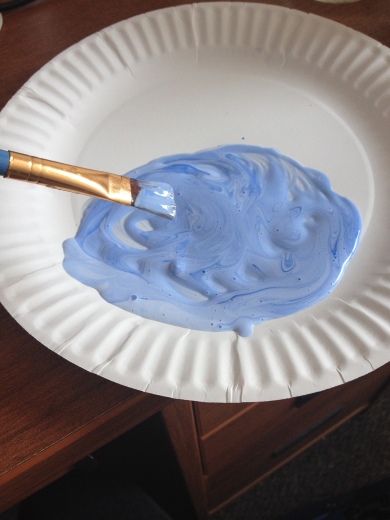
Anyway, here’s the process. Get a glob of mod podge on your fancy palette, or your pretend fancy palette. Then start mixing paint into it until you have your desired color. Keep in mind, it won’t look exactly the same when it’s done.

 Image

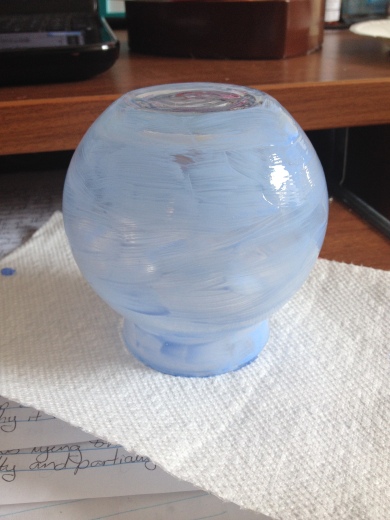
You can see that mine is sort of a periwinkle kinda color, but to me the finished product is way more purple than that. Weird, since I literally used only blue paint. Then, paint your jar!

Image


The thing about this project that is both unbelievably irritating and also part of what makes it so great, is that this is completely washable. It came in handy when I realized that I did a horribly messy painting job. When it was dry, some of it looked great but some of it was a little bit streaky and/or sort of chunky like I put too much paint there. So, I held it under the sink and scraped it all off in like five seconds so I could start over. That’s great if you think you’re like me and you’ll do a shitty job, but it’s also kind of sucky if you want it to last a long time. 

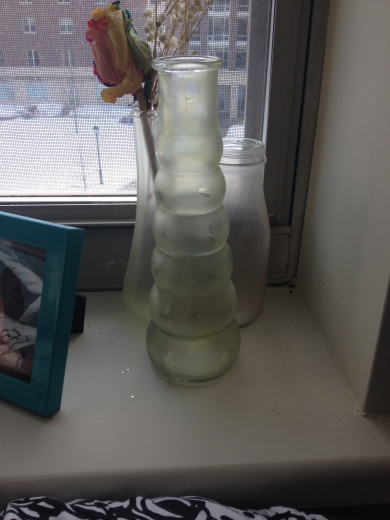
I have a confession, and it’s that I’ve tried this project before. I think that might be against my rules, but I make the rules so I declare this to be okay. I did it over the summer, and the results came out great. The colors were vibrant and pretty. I did a blue one, a green one and a yellow one. This is them now:

Image


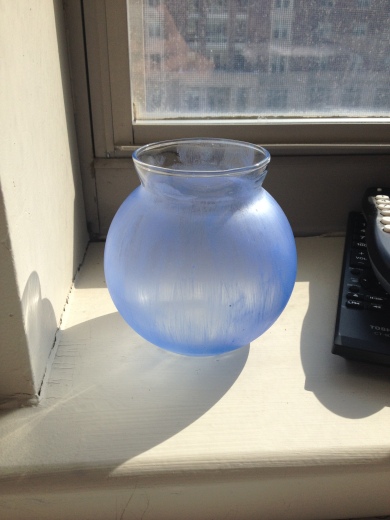
Soooo yeah. After a while, they start to fade. Especially these, since they’re always in my window which gets a lot of sun. You can barely tell the colors apart anymore, and you can see that the yellow one is chipping all over the place. So, this is a temporary project. It’s great for party decorations, or if you thought it was okay to paint your mom’s favorite vase and she has a panic attack, etc. It sucks if you’re looking for a permanent way to make your glass look like sea glass. Regardless, here’s the finished product, sitting on my windowsill being all cute:Image 

It needs some flowers or something. Paper flowers. Made out of tissue paper that I have :O New project! Also, keep in mind that if I had used the right kind of brush, it wouldn’t be so streaky. Yours have the potential of looking way better if you have access to the right materials 🙂

Hope you enjoyed this! I thought making sea glass would be a nice way to escape the winter and start thinking about the beach. We’re in the home stretch for all of this cold weather!

~Nicole


Valentine’s Day Candy Molds!

Hi guys!

So, this semester is supposed to be my craziest one yet. So far it is, but not for the right reasons.

I’m taking almost all psychology classes, and I have a job with a psych professor (I assume you’re all applauding) BUT since the very first day of classes after winter break, we’ve been bombarded by snowstorm after snowstorm after snowstorm. There have been almost as many snow days as class days (and we’re expecting another storm today, of course). That might sound fun, but I’m soooo not about it anymore. And I’m not the only one, either. My cousin made this her profile picture on Facebook:

Plus, I’m one of those people who can’t function without structure, and so Wednesday and Thursday both being snow days seriously made my brain hurt.

My friend Alli and I are alike in that way, so we’ve been suffering together, spending endless hours in the library doing work that hasn’t been assigned yet. Everyone off campus has supposedly lost power from this last storm, and they even made our Health Sciences building into a shelter for residents of our town. We had figured it was too dangerous to leave, until we hit rock bottom on our boredom scale. We had to get out, and naturally we ended up at the craft store.

Our friend Jill has a car on campus, so we took the bus down to the parking lot where she keeps it. The temperature was that painful level of cold where your eyes tear and then the tears freeze to your face, and we missed the first bus so we had to wait for another one. When we got there, her car was buried under like, three inches of snow and a layer of ice above it. The people in the parking spot across from her were also trying to dig their car out, and it kind of turned into a ruthless competition of who was going to get out first. The two girls kept giving us looks from the backseat of their nice warm car while the three of us hacked away at Jill’s car and their guy friend handled theirs. In the end, they got out first. But we were there first so technically we still win.

It pretty much felt like we were in the middle of “Frozen,” and I was starting to get really nervous about the roads. I got into a bad accident a few years ago because of black ice, so it freaks me out a lot. But as soon as we got out to the highway, everything was dry as a bone. There were no trees down, no wires down, and I only noticed a few buildings that seemed to be out of power. The Michael’s that we go to is in a giant strip mall (it’s really like a series of strip malls…it’s like an adorable little neighborhood full of every store you could ever want. I love it there!) and everything seemed to be up and running. I don’t really understand how we ended up in a state of emergency and all this stuff. 

We ended up in that section of the store for cake decoration and candy making. They have molding chocolate (well, most of them are vanilla flavored, but they also had chocolate and peanut butter) in every color and you can choose which ones you want and a mold to put them in. They have molds for lollipops, pretzels, or just plain candy, and they’re super cheap. There was a package with like hundreds of shapes in it for $9.99, and the candy wasn’t bad either. 

We got back to campus without incident, and here’s the best part of this project: We didn’t have to sign out the kitchen! You can literally do this right in your dorm room. Here’s what ya do:

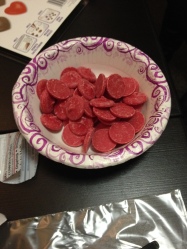
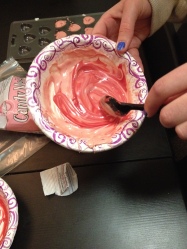
1. Melt the molding candy stuff in the microwave the way it says on the package. Don’t deviate from those directions, because if you do it too long, it’ll burn. When it burns it smells bad and can start a fire and gets chunky, not liquid-y. We got red and pink candy, and here’s what it looked like before and after melting (we mixed colors for fun, but yours will be a solid shade if you use one color)

Image  Image


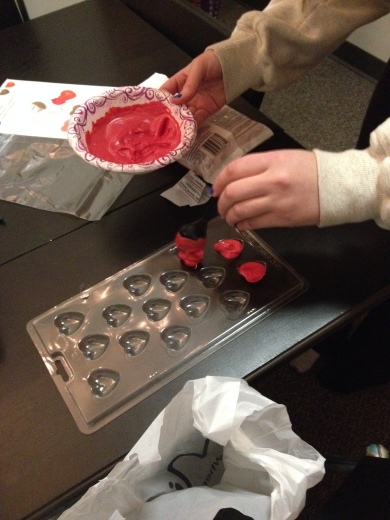
2. Put the melted candy in the molds. We used a spoon, but they suggest a piping bag because it’s more precise. We’re dorm chefs, we don’t have piping bags sitting around. We’re lucky if we have spoons lying around, actually. 

Image


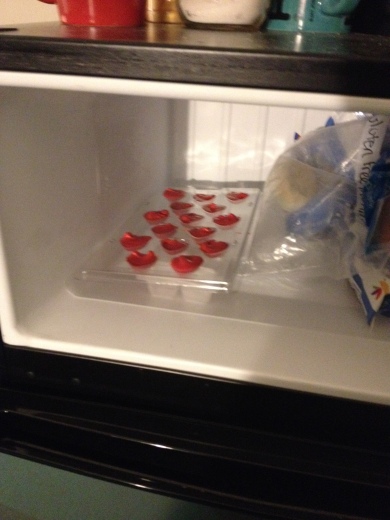
3. Once all of the molds are filled, you can even off the tops if you want to, but we didn’t bother. We put them right in the freezer and waited for a while until they had hardened back up. 

Image


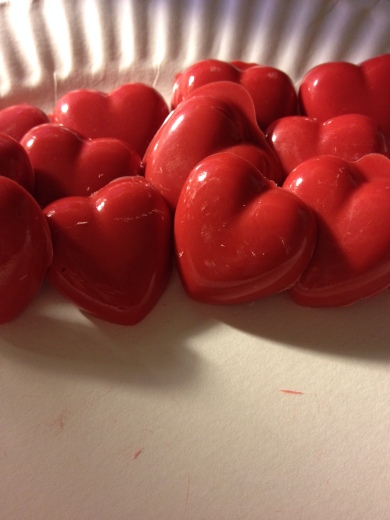
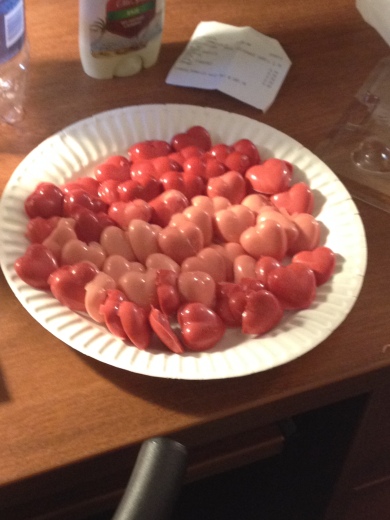
4. Once they’re solid again, you can pop them right out and eat them right away! Here’s how ours turned out:

Image


Image


They’re not all perfect, but we are first-time candy makers. I can’t wait to try this again, because they can be so impressive but it’s so so so so easy. We did this in like a half hour in four easy steps. Then, we went around our building offering them to our friends and even some strangers 🙂 It was a lot of fun!

So if any of you are as single as I’m going to be this Friday, there’s still something you can do. Make these cute little guys and spread some Valentine’s Day love to everyone around you. Candy is much better than boys anyway 😉

Oodles and oodles of love,

Nicole ♥

Valentine’s Day Fortune Cookies

Well,  I think the time has come to start giving you guys Valentine’s Day ideas. I’m really sorry that I ran out of steam for the end of the 25 Days of Christmas, but now there are some secrets to save for next Christmas 😉

So, I saw these perfect, adorable little fortune cookies that I was so excited to make for you guys. I was like: “this is great! What an adorable way to spend the day. You order chinese and just hang out, watch movies etc. Then, it’s fortune cookie time. Instead of finding a regular, boring tan one, that says “you will be hungry again in one hour” (true story, that really happened to me) you find a colorful one made with love by your significant other.

I clicked the link, and it brought me to a Martha Stewart project page entitled “Felt Fortune Cookies.” What in the world do you do with a felt fortune cookie?? And tell me that these little guys wouldn’t have fooled you too.

valentines

Okay, maybe I should have guessed by the opened one in the corner with hershey kisses in it, but I just noticed that right now. I was super annoyed, but I thought “okay, I’ll still give it a chance. It might still be easy and cute.” So I take a trip to Michael’s, which is 20 minutes away and ti was snowing, by the way. I assemble all of the listed materials, which are: felt, ribbon, fabric shears, wire cutters and craft glue. I thought nothing of the fact that it required wire cutters but no wire. I got all of my materials home, and started the project.

“Step one: Using wire cutters, cut a piece of floral wire slightly shorter than the length of ribbon.”

Can I just take a poll of how many people have floral wire sitting around their house? What even is floral wire? Come on, Martha. Step it up.

So, then I was determined to find a fortune cookie recipe. As you know, I’m limited to what I can find on Pinterest only, because this blog is dedicated to helping you figure out what’s actually easy and what’s just labelled “easy” as a sick joke. I did find one pretty quickly, and I have a funny little story about it.

So I’ve been trying to come up with a fitness pin to blog about, because I mentioned in the very beginning that I would include those, and I haven’t yet because it’s really hard for me to work out at school. Now that I’m home and back at my regular gym, I can start to try again. I came across this pin that claimed to be a Jillian Michaels recipe for losing five pounds. Here it is:

I was like “oh, this is cool. I could totally do this for the blog.” So I pinned it to my “For the Blog” board and promptly moved on to my fortune cookie search. The first one that I found took me to a blog called “My Name is Yeh.” Ironically, the girl’s name is Molly so I’m kind of confused but she’s adorable, and I really like her blog.

OH it’s her last name. Continuing.

She has this fortune cookie recipe that she says is way better than restaurant ones. She also said it’s chewy though, so I’m a bit skeptical. Regardless, she posted a bunch of pictures of her finished product, and take a look at the one of the fortunes she wrote:

I was a little weirded out, considering I just pinned a juice cleanse to the blog board, so I went back to it and clicked the link. I got an error message telling me that the page was taken down due to a possible problem with the page’s content.

UMM WHO ARE YOU, MOLLY? GOD?

Anyway, I’m live-baking today, so I’m finding out about these fortune cookies as I write about them, just like live-crafting. Here’s the link so you can follow along without me having to explain eeeeverything. http://blogs.forward.com/the-jew-and-the-carrot/189801/diy-fortune-cookies-for-christmas/

Okay, all of my ingredients are together. They’re not too crazy, but I did make a couple adjustments. I used cinnamon and nutmeg rather than cardamom, because I didn’t know what it was and the internet said this was a substitute. I also am adding red food coloring to make them more Valentine’s Day-like.  I also have to separate more eggs! I’m glad I had that miserable meringue experience now 🙂

Okay, so I mixed all of my dry ingredients and wet ingredients separately, and I’m about to mix them, but I’m a little skeptical about how this little bit of liquid is going to mix with aaaall of that flour and sugar.

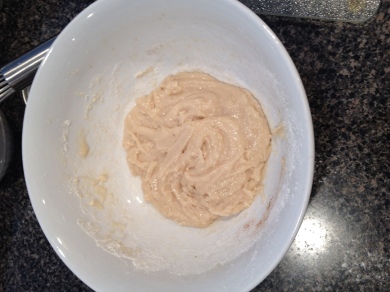
Image

Aaaaand I was right. I’m very confused. This is not a batter, it’s dough. That’s fine if it works, but her mix looks like she’s making pancakes and mine looks like I’m baking cookies. I’m gonna go with it.

Image

I’m using the mason jar method that she mentioned to get the right shape and size. I took it off of a decorative one that my sister has in her room. Shhh, don’t tell her.

Oh my God it’s so sticky.

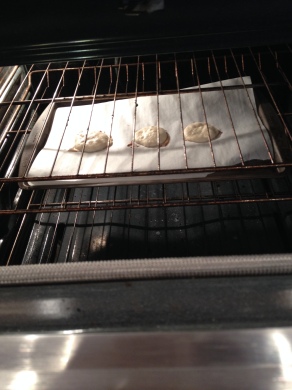
Okay, so I have three set up on parchment paper, and I’m moving them to a tray to put them in the oven for their 5-7 minutes.

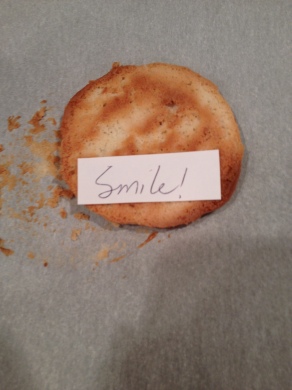
It’s taking longer than five minutes…longer than 7 minutes…okay 8 minutes to turn golden brown. The problem is, they look like regular cookies. They’re too thick and unfoldable.

ImageImageImageImage

In addition to not looking like a fortune cookie, it tasted like way too many spices and it kind of gave me a headache. I threw the rest of the batter out. Also, I just realized I forgot to put in the red food coloring anyway. Duh. Well, I’m clearly out of practice. I haven’t baked since my last blog. Ugh, ya live and learn I guess. I may try to find another recipe for fortune cookies to see if this was something I did wrong or if Molly is in fact not God. If I do, you’ll be the first to know!

See you next week!

Love,

Nicole ♥

Day 22: Caramel Filled Snickerdoodles

These sounded absolutely heavenly, and they were so simple that I couldn’t resist. Who doesn’t love a nice warm caramel cookie on a cold winter day?

It’s still 60 degrees, but I’m asking you to just please play along for me. 

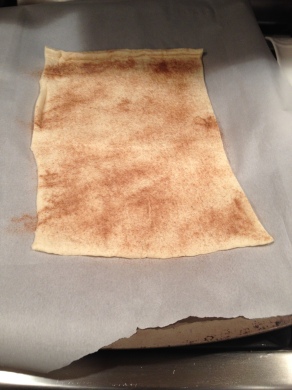
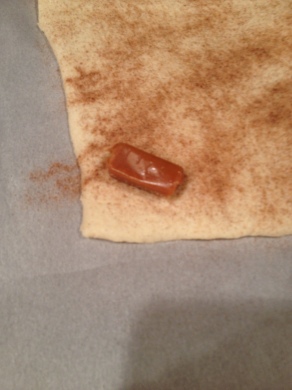
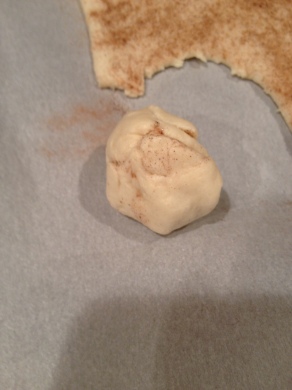
All you need for this recipe is chewy caramel candies, SEAMLESS crescent dough from Pillsbury, and cinnamon sugar. And also a cookie sheet and parchment paper, but whatever. 

Here’s what you do, in picture form:

Image


Image


Image


Image


Image


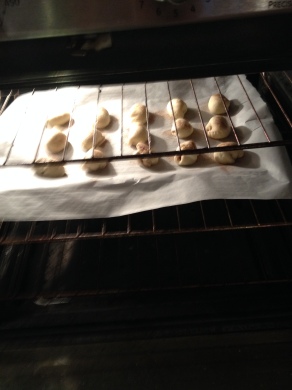
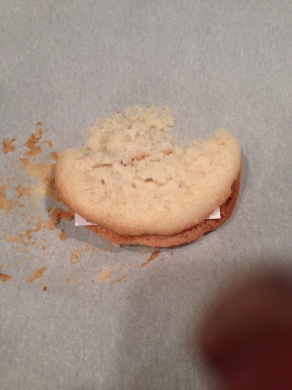
I was really excited, because I was absolutely sure that these were going to come out flawless. I actually sprinkled some more cinnamon sugar over the outside before I put them in, too. Then they came out of the oven (which should be preheated to 350) after 12 minutes, and this is what I saw:
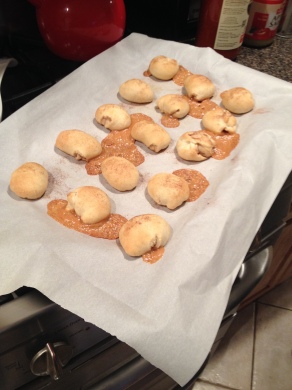
Image


Aaaaaand then I was heartbroken. But all hope was not lost: I picked one up, and it turns out that they weren’t nearly as bad as they looked. They just leaked, but they weren’t ruined, so I consider this to be four pins in a row that did NOT fail! Now this HAS to be a record for me. The only problem though, was that I really didn’t like the taste as much as I thought I would. That’s not up to me though, it’s up to you to decide. If you try it, let me know what you think! Maybe they’re delicious, and I’m the one missing out 🙂

See you soon!

Love, 

Nicole ♥

Day 21: Copycat Starbucks Caramel Apple Spice

This recipe is too sweet for most people I know, but those words are not in my vocabulary, so naturally it’s one of my favorites 🙂 If you’ve never tried it, it’s worth at least one try, and this copycat recipe is a great way to do that.

Today my Christmas present from Lindsay, my best friend at school (you guys remember Lindsay; she knows how to make peanut butter cookies) came in the mail. It presented the perfect opportunity for me to make a nice hot drink for a cold winter day 🙂 
Actually, it’s about 60 degrees Fahrenheit right now, in the middle of December, but who’s really paying attention. 

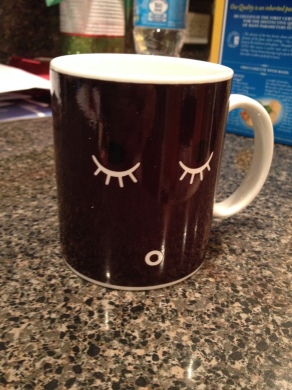
Look how cute it is!

Image


It was so funny because when I was online buying her present, I saw this mug and I put it IN my shopping cart but I decided that I didn’t have enough money for it at the moment, so I just bought her gift. I was upset though, because not only does this mug make a super cute tired face, IT TURNS INTO A HAPPY FACE WHEN YOU PUT A HOT DRINK IN IT :O Sure enough, this little guy showed up on my doorstep a few days later 🙂 It was a Christmas miracle 😛 And in her card she wrote something like “this was so cute and just a little bit corny so I knew you’d love it.” She knows me too well.

Anyway, since I now have an adorable coffee mug, I knew I had to make this recipe. All you need is apple juice, water, cinnamon, brown sugar, whipped cream and caramel sauce. 

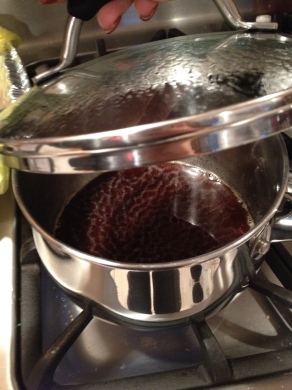
You take the 1/2 cup of water, teaspoon of cinnamon and 1/2 cup of brown sugar and simmer them in a pot for five minutes to make a cinnamon-y syrup thing. Mine looked like this:

Image


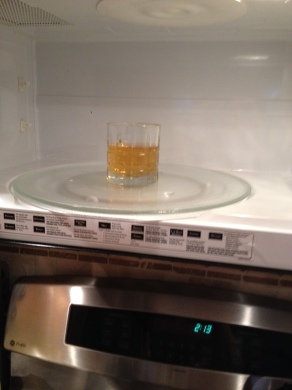
Then, you heat up your apple juice. I could have heated it up on the stove like I was told, but I didn’t want to get another one dirty so I did this instead:

Image


Whatever works, right? So once your apple juice is heated up, you add the syrup to it. The ratio they gave me in the recipe was 3 tablespoons of syrup for 12 ounces of juice. 12 ounces didn’t quite fit in the mug, so unfortunately I had to wake up my math brain, but it ended up working out. Once that’s all mixed together, you add your whipped cream and caramel syrup on top, and that’s it!

I’ve had three pins in a row work out for me. I think this is a new record. Here’s the final product, in my new favorite mug ♥

Image


See you soon!

Love, this happy girl 

Image